Creating relations
A relation is a connection between a field of one entity table and another field of a different entity table or entity identifier (EID). When you create a relation, a join operation is performed between two Elasticsearch indices.
To create a new relation, complete the following steps:
-
Go to the Data model app and select an entity table.
-
Go to the Relations tab and click Create a relation.
-
In the From section, select a field.
-
In the To section, select the search and field to create the relation to.
-
In Relation labels, describe the relationship between the two entities, for guidance see Naming relations.
-
If the relationship is the same in both directions, switch off Directed relation.
-
-
Click Save relation.
-
To view samples of how the records appear in any of the relations, click Preview in the relations list.
The relation is displayed in the configuration screens of both entity tables. You can view a graphic representation of the related entities on the Data model graph.
|
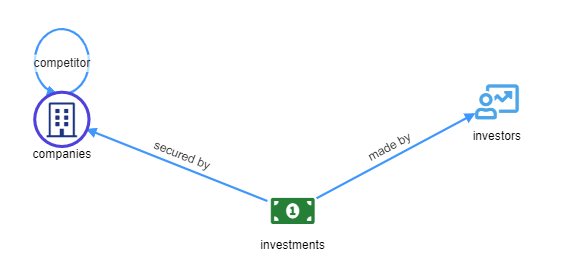
You can create a self-relation between two entities of the same type, for example, companies are the main competitors of other companies. However, you can’t define a relationship between two entity identifiers. |
Naming relations
Naming is important when you are configuring a data model. Poor name choices make dashboards difficult to navigate and long names make the user interface difficult to read.
When choosing names, imagine yourself in the place of the user at the moment where the relational navigation is performed. In the companies example data, you could say that a company received an investment. However, for investments it’s more meaningful to say it’s secured by a company. Often, you can use active and passive descriptions, such as saw and seen by. Other times, the relationship is the same in both directions, such as sibling or spouse.
Setting preferred relation directions
By default, when you add or expand a node in the Graph Browser, relations are displayed from the perspective of that node. For example, if you expand a Company node, arrows with the label secured point towards Investment nodes. If you expand an Investment node, arrows with the label secured by point towards company nodes. However, you can set a preferred direction by clicking the star beside a relation label in the relation editor. When a preferred direction is set, the relation is always displayed with that direction in the Graph Browser.
For more information about navigation between relationally connected dashboards, see Relational Navigator.
Optional: Configuring advanced settings for relations
You can manually set the following join behavior:
-
Join types: Siren Federate automatically selects the best algorithm for a join. However, you can force the join selection. For a detailed description of each algorithm, see the Siren Federate plugin documentation.
-
Join timeout:
-1sets the limit to the default specified in thesiren:joinTaskTimeoutsetting of Management > Advanced Settings.0removes the limit. See Advanced settings for relations. -
Count: Display or hide counts.